Photo by Clay Banks on Unsplash
Multi-Targeting in .NET MAUI - Part 1
What is Multi-Targeting and how can you take advantage of it?
Intro
I am a huge fan of the Dependency Inversion Principle (DIP). I apply it via Dependency Injection (DI) and Inversion of Control (IoC) a lot in my projects, because I like developing loosely coupled, well structured software components that are easy to maintain and extend.
However, when it comes to mobile application development and especially to UI related topics that do not involve any business logic, applying the DIP for platform-specific APIs can be quite cumbersome and seems like overkill, because it often involves Interfaces and IoC containers (or the Dependency Service in Xamarin.Forms).
In this blog post, I am going to explore an alternative approach to using platform-specific code that comes already built-in with .NET MAUI: Multi-Targeting. It is a clean way to implement and call platform-specific APIs, e.g. to dim the display, set the volume for audio playback or display a notification to the user without requiring interfaces and IoC containers.
In the .NET realm, the term has been around for a while already - .NET MAUI just makes heavy use of it with the single project approach. In Xamarin.Forms, you would need to create an interface, then create the different implementations in the platform projects and either register the implementation with the Dependency Service or with any other IoC container. That's not necessary anymore in .NET MAUI. Interfaces and Dependency Injection may still be required for complex, business-logic related scenarios, but this requirement has become optional for simple platform-specific APIs.
Hello from [Platform]!
In this first part, we will simply display a message to the user from within an event handler for a simple Button press event:
<Button Text="Say Hello" Pressed="Button_OnPressed" />
When the Button is pressed, a "Hello from [Platform]!" message is shown and depending on the platform, it will either be "Hello from Android!", "Hello from iOS!", "Hello from Windows!" or "Hello from MacCatalyst!".
Let's start with the simplest (and older) form of condition-based access to platform-specific code.
Conditional Compilation
One approach to build and ship platform-specific implementations is to use preprocessor directives (like #define, #if, #elif, etc.) and only compile certain bits of code when a specific target platform is selected. This is called conditional compilation and like the name says, specific parts of the code only get compiled when certain conditions are met.
For example, if we wanted to display an alert message with a different text on each platform, we could simply write the following code somewhere in our UI code, e.g. in an event handler that gets triggered when a Button was pressed:
    private async void Button_OnPressed(object sender, EventArgs e)
    {
#if ANDROID
        await DisplayAlert("Hello", "Hello from Android!", "OK");
#elif IOS
        await DisplayAlert("Hello", "Hello from iOS!", "OK");
#elif WINDOWS
        await DisplayAlert("Hello", "Hello from Windows!", "OK");
#else
        await DisplayAlert("Hello", "Hello from another platform (MacCatalyst, Tizen, ...)", "OK");
#endif
    }
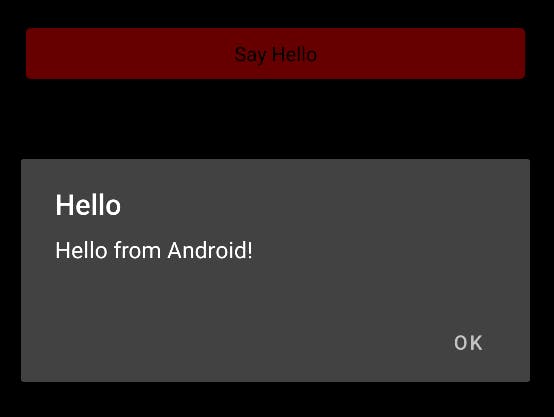
Tapping the Button now triggers the display of an alert that looks like this on Android and very similar on the other platforms, just with different text:
This works and certainly is a valid approach for simple scenarios, but the code doesn't look great. As a general rule, preprocessor directives should be handled with care and should be avoided whenever possible as they lead to code that is illegible and difficult to maintain. They also bear the danger that some conditions are set incorrectly and then debugging becomes difficult quickly.
Imagine having to write a platform helper class that provides access to various different platform-specific APIs. Muddling them all together quickly becomes messy. Wouldn't it be better to separate the different implementations per platform instead? I think so, too.
Let's look at one of the alternatives.
A simple, but better approach
Essentially, the built-in Multi-Targeting in .NET MAUI allows developers to implement and call platform-specific code from a shared context while only building and shipping the relevant parts of the code for the target platform.
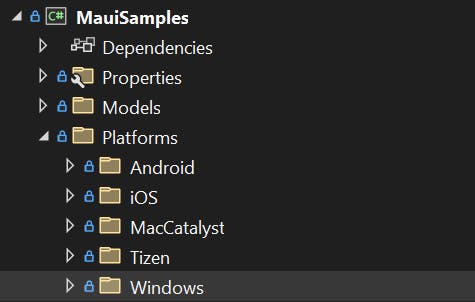
The single project created via the default template comes with a Platforms folder and sub-folders for each separate platform, e.g. Android, iOS and so on. This structure provides a basic setup; the contents of the individual platform folders are only built and shipped for the targeted platform.
This allows us to create platform-specific assets and even redefine the same class inside the same namespace per platform without any build conflicts, all while keeping the irrelevant parts from the different platforms out of the resulting platform-specific app.
Now, instead of using conditional compilation, we can create a separate file in each of the platform-specific folders that the single project comes with by default and provide an implementation there. This will certainly work and probably is the best for simple scenarios like the one shown above with the DisplayAlert() call.
Let's create a Messages.cs for each platform with the following content:
Android
namespace MauiSamples;

public static class Messages
{
    public static async Task SayHello(this Page page)
    {
        await page.DisplayAlert("Hello", "Hello from Android!", "OK");
    }
}
iOS
namespace MauiSamples;

public static class Messages
{
    public static async Task SayHello(this Page page)
    {
        await page.DisplayAlert("Hello", "Hello from iOS!", "OK");
    }
}
MacCatalyst
namespace MauiSamples;

public static class Messages
{
    public static async Task SayHello(this Page page)
    {
        await page.DisplayAlert("Hello", "Hello from MacCatalyst!", "OK");
    }
}
Windows
namespace MauiSamples;

public static class Messages
{
    public static async Task SayHello(this Page page)
    {
        await page.DisplayAlert("Hello", "Hello from Windows!", "OK");
    }
}
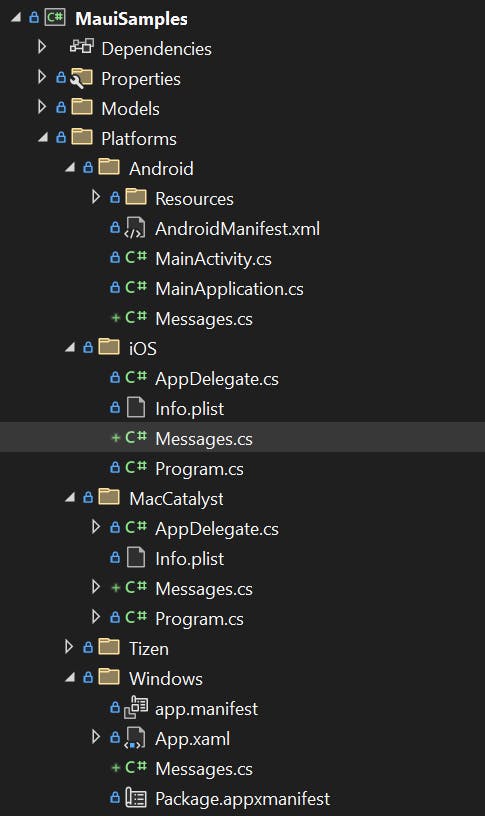
After adding all the Message.cs files, our project structure looks as follows (note that each platform has its own Messages implementation now):
Important: Please note that the namespace and the class name must be identical in each of the Messages.cs files in order for this approach to work. This is a general rule for multi-targeted APIs.
We can now update the event handler of the Button as follows:
    private async void Button_OnPressed(object sender, EventArgs e)
    {
        await this.SayHello();
    }
As we can see, the preprocessor directives are gone and we can call the SayHello() method as an extension method on our MainPage in a single line without having to worry about invoking platform-specific code anymore, because the build system takes care of that for us. It is much cleaner, more legible and easily maintained and extended.
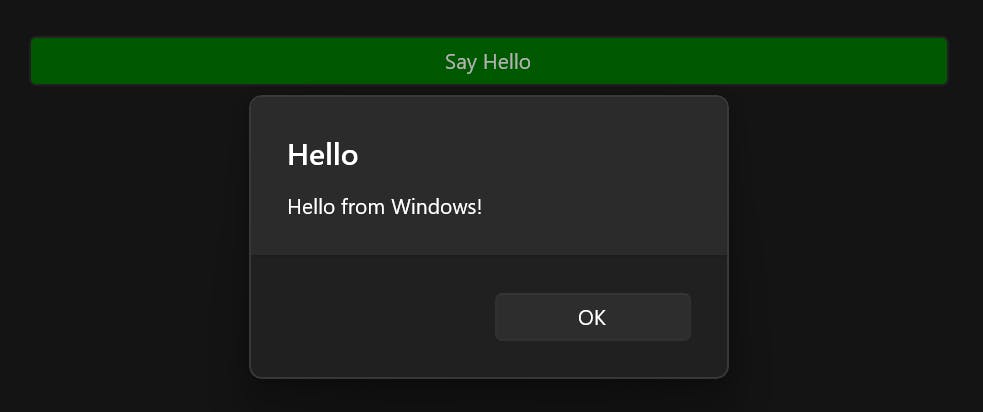
It still works (showing Windows this time):
Conclusions and next steps
The built-in Multi-Targeting approach of .NET MAUI is quite powerful, it works beautifully and usually suffices for simple uses cases like the one presented in this article. I have only shown how to handle the platform differences, no actual platform-specific APIs have been invoked so far. I will get into actual platform-specific APIs in some of my upcoming blog posts (e.g. for setting the screen brightness on each platform).
In Part 2, I will explore more advanced setups that involve unit tests and dependency injection, which require a different approach to Multi-Targeting. I will show how to setup your project using filename-based Multi-Targeting and partial classes for platform-specific implementations. So, stay tuned!
If you enjoyed this blog post, then follow me on LinkedIn, subscribe to this blog and star the GitHub repository for this post so you don't miss out on any future posts.


