Platform-specific XAML in .NET MAUI
Learn the magic of custom XAML across Platforms & Devices

I am a passionate mobile app and software developer with a focus on C# .NET, Xamarin.Forms and .NET MAUI.
Introduction
Cross-platform development is amazing, you only need to write the code once and then you can deploy to multiple platforms all from the same code base. Or so the theory goes. In reality, each platform has specific, native capabilities and APIs which sometimes need to be handled separately.
In my series about multi-targeting I've already touched on this topic, but the focus was on platform-specific APIs. Each platform has a different look-and-feel and sometimes you want things to look native or you want UI elements to look a certain way on a specific platform, like having a green underline on Android and a red underline on iOS or different icons and logos. There's a plethora of ways to customize how your app looks, such as control customization using handlers and markup extensions to name just a few.
Sometimes, styling or customizing individual controls just isn't enough, though. What if you need an entire part of a page to look very different on each platform (or device type) like someone asked in this Stack Overflow question: "Can we also have platform-specific XAML?" The answer is simple: Yes, we certainly can!
In this blog post, I'll show you a few ways how you can use custom XAML files in your app based on the platform or device type. One of the obvious choices would be to use multi-targeting. Unfortunately, .NET's multi-targeting currently doesn't support conditional XAML compilation or proper exclusion of XAML files based on the target platform (yet). Therefore, I'll show other approaches that work well for me.
To keep things simple, I'll only focus on custom views. Custom platform-specific pages can also be instantiated, which can be seen in my answer to the Stack Overflow question above as well as in my sample repository.
First, we'll look into two code-behind approaches, one using a runtime decision and another one using conditional compilation. After that, we'll explore a purely XAML-based approach. For the latter, we'll use different XAML files than for the first two approaches, so that the different approaches remain distinct in the sample code.
Code-behind approaches
Since this post is about XAML, let's start with a simple layout. Here, we have a VerticalStackLayout and it has an x:Name set so that we can manipulate the contents of it by accessing it via the VerticalLayout identifier in the code-behind.
<Grid RowDefinitions="*,4*">

  <VerticalStackLayout
    Grid.Row="0"
    x:Name="VerticalLayout" />

</Grid>
In the next two subsections, we'll see how we can add different XAML views to this layout based on the target platform.
Runtime decision
The simplest way to show platform-specific views is to make the appropriate calls in the code-behind based on the current runtime platform:
if (DeviceInfo.Platform == DevicePlatform.Android)
{
    VerticalLayout.Add(new Android.ViewAndroid());
}
else if (DeviceInfo.Platform == DevicePlatform.iOS)
{
    VerticalLayout.Add(new iOS.ViewiOS());
}
The downside of this approach is that the resulting code will be available on all target platforms.
Conditional compilation
An alternative and slightly better approach compared to the runtime decision is to use conditional compilation instead:
#if ANDROID
    VerticalLayout.Add(new Android.ViewAndroid());
#elif IOS
    VerticalLayout.Add(new iOS.ViewiOS());
#endif
The advantage of this is that only the appropriate calls end up in the compiled app code for each target platform and no decision needs to be taken during runtime.
XAML-only approach
It's also possible to show only the relevant parts of the UI based on the current runtime platform by only using XAML and no C# code by taking advantage of <OnPlatform>:
<Grid RowDefinitions="*,4*">

  <ContentView
    Grid.Row="1"
    Padding="20">

    <OnPlatform x:TypeArguments="View">
      <On Platform="Android">
        <android:ImageViewAndroid />
      </On>
      <On Platform="iOS">
        <iOs:ImageViewiOS />
      </On>
    </OnPlatform>

  </ContentView>

</Grid>
Here, we have a ContentView that serves as a container and we control its content by using the <OnPlatform> class and providing different views for each platform. It's important to include the x:TypeArguments="View" attribute, because we need to tell <OnPlatform> what the return type is as the ContentView class only accepts View instances as its Content. It's really as simple as that!
Note: This is equivalent to the runtime decision approach in the code-behind, meaning that all views of all platforms will be included in the app bundle.
It's also possible to use <OnIdiom> to provide different views depending on the device type (e.g. tablet, phone, desktop):
<Grid RowDefinitions="*,4*">

  <ContentView
    Grid.Row="1"
    Padding="20">

    <OnIdiom x:TypeArguments="View">
      <On Idiom="Tablet">
        <tablet:TabletView />
      </On>
      <On Idiom="Phone">
        <phone:PhoneView />
      </On>
    </OnIdiom>

  </ContentView>

</Grid>
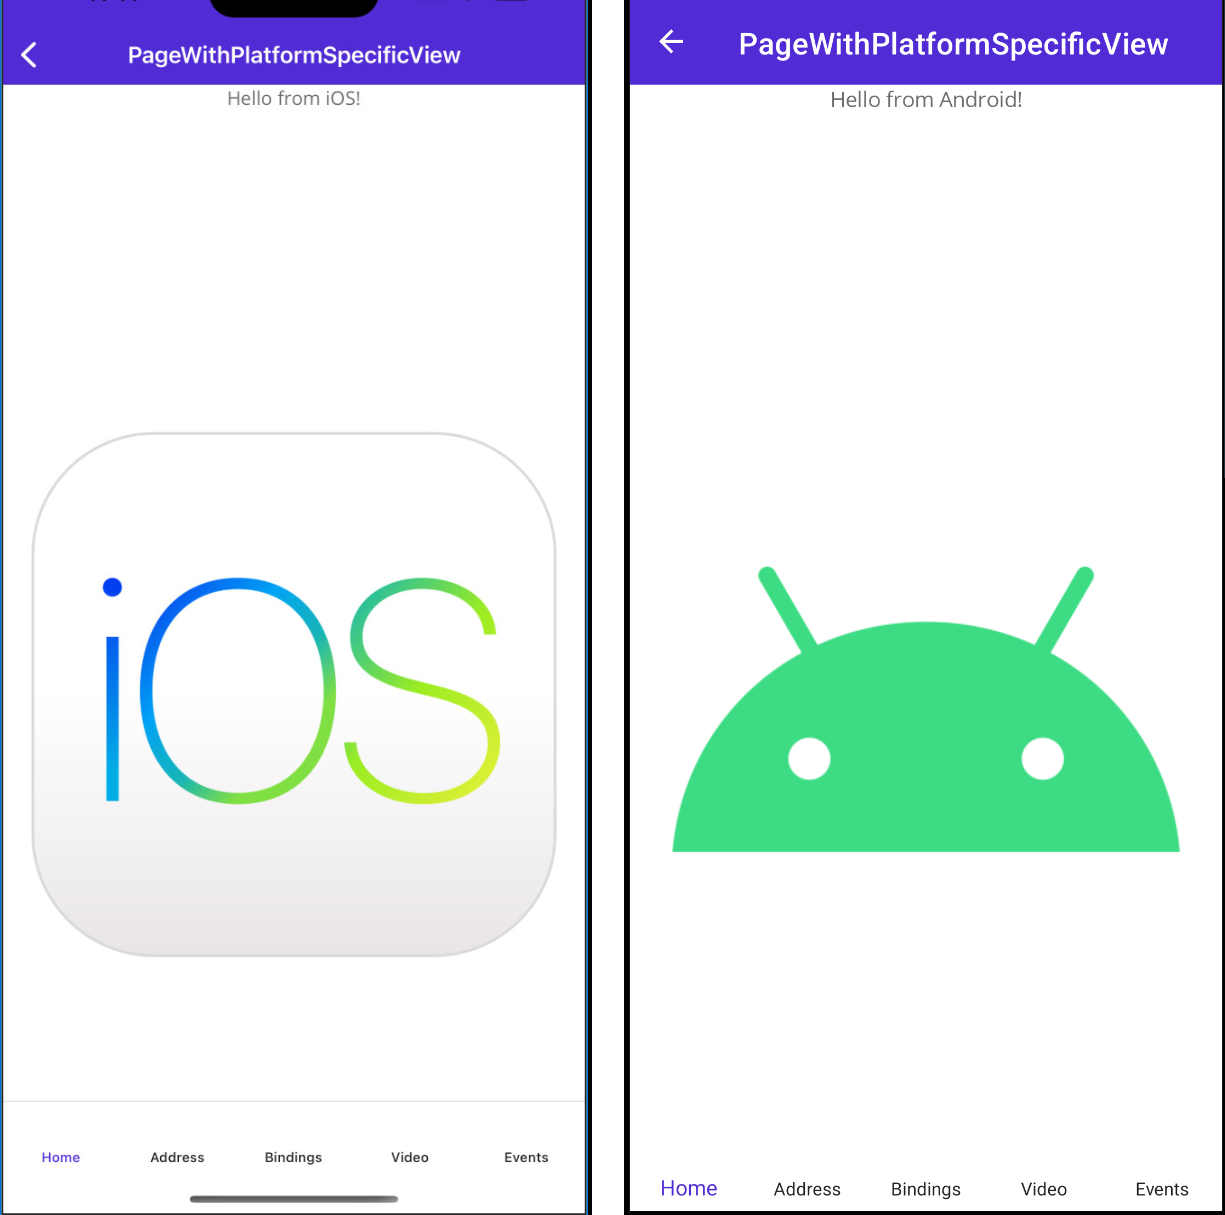
Result
This is what it will look like on iOS and Android using the different approaches I demonstrated above. The "Hello from iOS" and "Hello from Android" parts come from the code-behind approaches while the logos come from the XAML-only approach.
Notes
As I have mentioned already in the introduction, multi-targeting specifically for XAML isn't really supported (yet), unfortunately. I have spent a fair share of hours trying to figure out how to accomplish this and although I have found a potential solution, it comes with several drawbacks, which is why I decided not to show it as of now. If future versions of .NET support multi-targeting for XAML or if I manage to figure out a well-working solution, I will write a follow-up on this topic.
Bear in mind that due to the nature of the implementation of the approaches above and the fact that multi-targeting currently isn't supported for XAML, only the code-behind is subject to conditional compilation. This means that all XAML code of your app project will be shipped to all target platforms, even the unused XAML which is specific to other target platforms (or device types).
Conclusions and next steps
As we have seen, it's actually quite easy to have platform-specific XAML in our .NET MAUI applications by using runtime decisions (either in C# or XAML) or conditional compilation.
Although it's not possible (yet) to use conditional compilation for XAML or even filename and folder-based multi-targeting for XAML files, the presented approaches can help you elevate the user experience of your cross-platform app by providing platform-specific views with ease. I hope you learned something useful today. Enjoy building awesome cross-platform apps with platform-specific views with .NET MAUI!
If you enjoyed this blog post, then follow me on LinkedIn, subscribe to this blog and star the GitHub repository for this post so you don't miss out on any future posts and developments.